Friday, August 8, 2014

Keep both Dolby Digital 5.1 and Dolby TrueHD 7.1 audio when ripping Blu-ray discs


Here is a brief guide to teach you how to keep best audio quality (Dolby Digital 5.1/Dolby TrueHD 7.1 audio) when playing Blu-ray Disc.

Most Blu-ray Discs have lossless audio, which means, obviously, no loss of sound quality, and they are encoded in three ultra high-quality lossless formats: uncompressed PCM, DTS HD Master Audio and Dolby TrueHD.

Dolby Digital 5.1 and Dolby TrueHD 7.1

The Dolby TrueHD technology and DTS-HD Master Audio can deliver unprecedented home theater experience. In case that you are definitely love Blu-ray audio with the high quality sound experience, you may have the need keep Dolby Digital 5.1/Dolby True HD 7.1 when playing Blu-ray on computer and media player.

How to meet your need? Here Pavtube ByteCopy is just the one you need which is a best BD ripping tool and backup disks without quality loss, allow full preservation of all audio tracks, subtitles and chapter markers, what's more, it saves 7.1 surround audio from original disks.

Now just r
efer to the guide below ripping Blu-ray discs with keeping Dolby Digital 5.1 or Dolby TrueHD 7.1 audio

Compare: MakeMKV vs Pavtube ByteCopy vs DVDfab

Software availability:

Pavtube ByteCopy Trial version - A trial is free but functional-restricted. Lossless output can be used 3 times only. You may download a trial and see how it works.

Pavtube ByteCopy Retail version. A full version is offered at $42 by Pavtube Studio.

How to keep Dolby Digital 5.1/Dolby True HD 7.1 audio when ripping Blu-ray movies?

Step 1. Hook up an external BD drive with my desktop (if there is not an internal one), and place a Blu-ray Disc into the BD drive.

Step 2. Run Pavtube ByteCopy software and click the "Load file(s)" icon to import movie files from Blu-ray Disc.
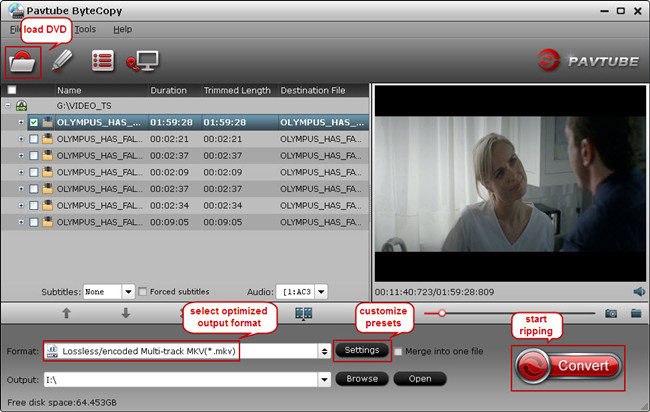
Blu-ray to lossless mkv

Step 3. In the dropdown list of Format menu, you can find several MKV options for output. Here we recommend "Lossless/encoded Multi-track MKV (* mkv)" under "Multi-track Video" catalogue. Because it will save multiple video, audio and subtitle tracks form original Blu-ray in output MKV and you won't suffer any quality loss.
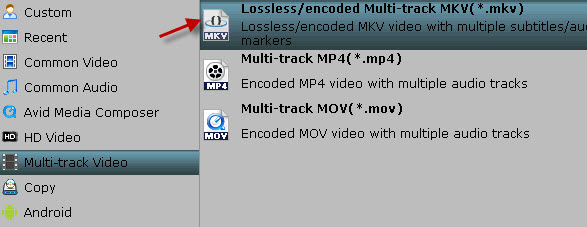
lossless mkv format

Note: Make sure the original BD disc does contain Dolby TrueHD audio, otherwise you still can't get Dolby TrueHD 7.1 audio saved.

Step 4. You can check the audios you want to keep and uncheck the audios you don't need. It all depends on your own choices.
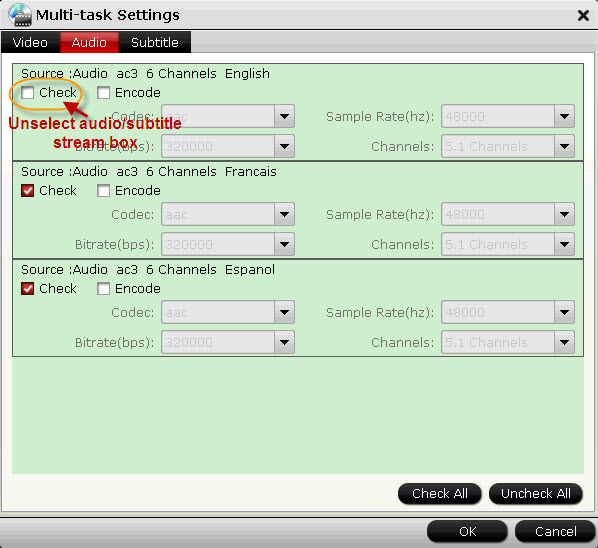
unselect audio track

Note: Not every AV receiver/amplifier can decode Dolby TrueHD and DTS-MA audio, but most of them support Dolby Digital, i.e., AC-3 5.1 audio codec. When ripping Blu-ray Disc for playing back with PC and HD media players, better check the supported codec of your device first to set a best fit for your player. 

So to transode blu-ray audio streams into Dolby Digital 5.1 tracks, you can check "Encode" and get a encoded mkv file.

Step 5. Click the "Convert" button to start ripping the Blu-ray movie to MKV file. After conversion I click "Browse Export Path" and get an MKV file.

Pavtube ByteCopy extracts the main movie with all subtitles from disc and seals the contents with riginal Dolby Digital 5.1 and TrueHD 7.1 audio saved into MKV container which means ripping Blu-ray lossless

 That's it! Now you will have a great high definition Blu-ray with great audio experience!.

Read More:

Tuesday, August 5, 2014

Rip 3D Blu-ray to PC and 55 inch LED 3D television for playing

This guide will help you convert and transfer 3D Blu-ray to 3D MP4 for backing up on PC and playing on 55 inch LED 3D television. Here, 3D Blu-ray Converter will be helpful.

Nowadays, 3D technology developing more and more fast, 3D gives us different visual feeling. Under normal circumstances, if you want to enjoy 3D movies, you just need a 3D TV, a 3D Blu-ray player and a pair of 3D glasses.

55 inch LED 3D television

But the good news is that, now you can backup your Blu-ray on PC and use 55 inch LED 3D television to play 3D Blu-rays with keeping 3D effect. Then you can enjoy 3D movies at home. Here I’ll show you a simple solution with you: copy 3D Blu-ray to PC and play them on 55 inch LED 3D television without 3D Blu-ray player.

At first, you need to rip 3D Blu-ray disc into 3D SBS MP4/MKV videos so as to play 3D Blu-ray on 55 inch LED 3D television. I suggest you the Pavtube BDMagic as the best 3D Blu-ray converter for best video and audio playback on 3D devices. Now you can download the software and take a try.

Mac users can have a look at Pavtube BDMagic for Mac.

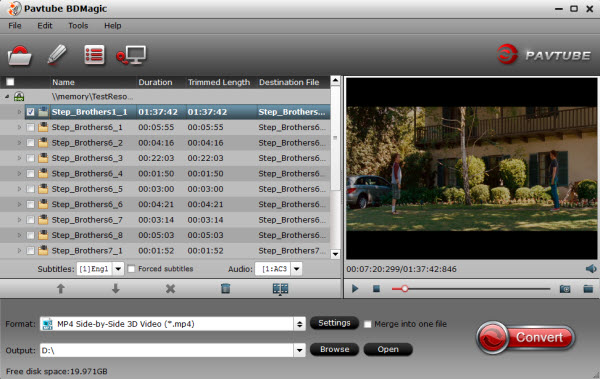
Step 1. Launch and install the best 3D Blu-ray Converter, then click the “Load file(s)” icon to import the inserted 3D Blu-ray, also you can select preferred language in “Subtitles” and “Audio” box.

best 3d blu ray converter

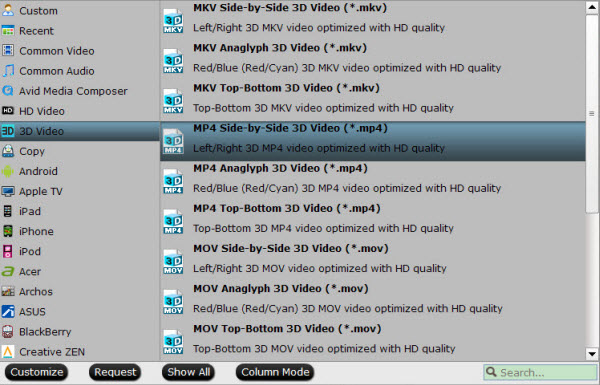
Step 2. Click drop-down “Format” and choose the “3D video>MP4 side by side 3D video” as the 55 inch LED 3D television best format. MKV is also the 3D television compatible format.

side by side 3d mp4 for 3d tv

Tip: you can adjust resolution, bitrate, frame rate, etc by clicking the “Settings” button, if you don’t know how to set , please keep original to ensure the 3D video quality.

Step 3. Hit the “Convert” button to rip your 3D Blu-ray movie to 3D MP4/MKV video, when it finishes, you can successfully copy your 3D blu-ray on PC and now you are ready to transfer your 3D Blu-ray movies to 55 inch LED 3D television for enjoying.

What’s more, the software can rip 2D Blu-ray to 3D video with 3D effect, you can have more try at http://www.multipelife.com/.

Here is the bundled software for you:

BDMagic($49) + DVD Creator($35) = Only $49.9, Save $28.1

Wednesday, July 30, 2014

Can you watch AVI Videos on PS Vita

Have problems when playing AVI video files on PS Vita? Here you will find the best solution.

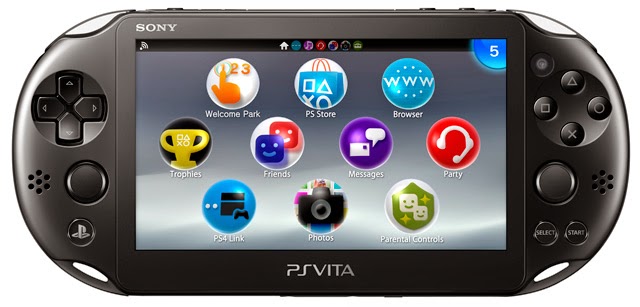
Sony recently touted that between the PlayStation 4, PlayStation 3, and PlayStation Vita the company has sold over 100 million systems, but it admits that the Vita might not be the platform of choice for AAA Western games.

PlayStation Vita

Can you watch AVI Videos on PS Vita?

I've been watching anime for a few months now and making do with just watching on my PC, but now I've been forced to share a room with my brother so don't always have access to my PC, is there a way to convert .avi to a .mp4 format that my PS Vita could handle so I can watch anime in bed/on the go, or even .avi files I can then convert to .mp4? I've tried Handbrake and the quality was terrible, as well as freemake video converter, which didn't work at all. Can anyone help?

In fact you simply need a power AVI to PS Vita Converter to transcode your AVI video to  PlayStation Vita recognizable video format, for instance convert AVI to MP4. PS Vita Video Converter Ultimate is just masterful at the job of converting MKV to PS Vita optimized MP4.

Preparations:

1. AVI videos stored (externally-downloaded or from other source)
2. Download and install Pavtube Video Converter Ultimate for PS Vita or its equivalent Mac version.

How to Convert AVI video to PS Vita for watching

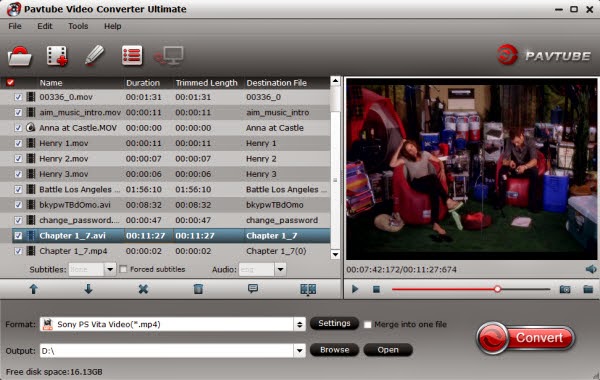
Step 1: Load AVI video to the Pavtube Video Converter Ultimate

Click "Add Video" button to load AVI files from hard drive, or you can simply drag and drop the files to this program directly. Batch conversion is supported so that you can add multiple files.

Convert AVI to PS Vita

Step 2: Select an output format for PS Vita

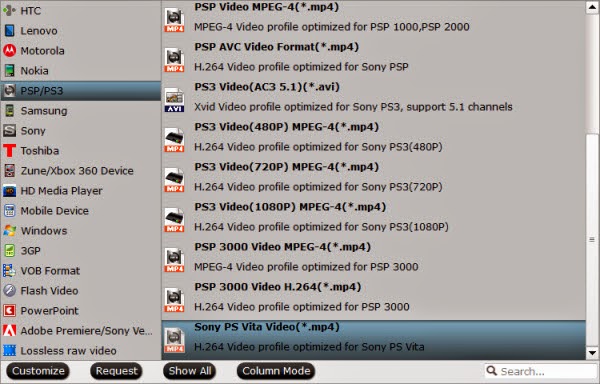
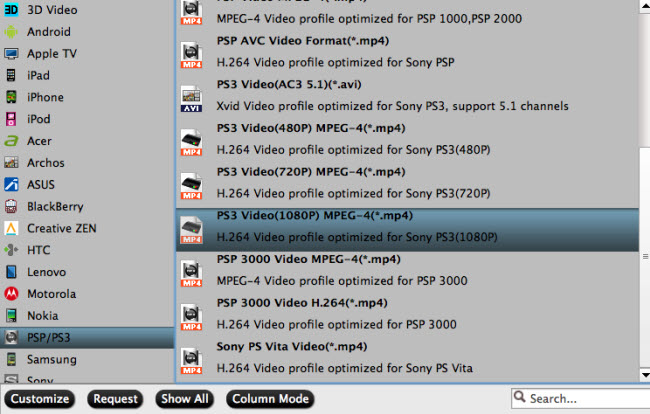
Select PS Vita video format from the drop-down profile list of "Format" bar. Here you're recommended to choose "Sony PS Vita Video(*.mp4)" from " PSP/PS3" category. The output videos could fit on the PS Vita perfectly.

PS Vita Video Format 

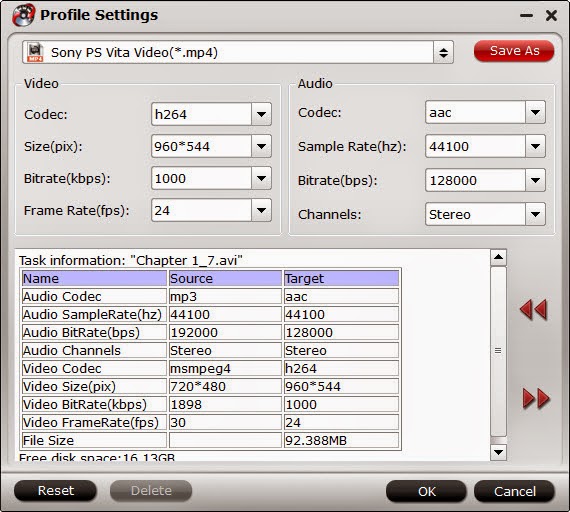
If you like, you can click "Settings" to change the video encoder, resolution, frame rate, etc. as you wish. Keep in mind that bitrate higher results in big file size, and lower visible quality loss, and vice versa.

PS Vita Video Settings

Step 3: Convert AVI video to PS Vita

Click "Convert" button to start converting AVI videos to PlayStation Vita. When the conversion finishes, click "Open" to get the result mp4 videos, add them to your PS Vita. Just enjoy the movies!

If you have some Blu-ray collections and want to convert them for playing on PS Vita, learn this tutorial here.

Saturday, July 26, 2014

Get Faster DVD & Blu-ray ripping GPU-Accelerated encoding with CUDA/AMD APP

GPU-Accelerated encoding with AMD APP (formerly ATI Stream) supplys Pavtube users Faster video converting/DVD & Blu-ray ripping. 

AMD (NYSE: AMD) is a semiconductor design innovator leading the next era of vivid digital experiences with its groundbreaking AMD Accelerated Processing Units (APUs) that power a wide range of computing devices. AMD's server computing products are focused on driving industry-leading Cloud computing and virtualization environments. AMD's superior graphics technologies are found in a variety of solutions ranging from game consoles, PCs to supercomputers.

The AMD APP(formerly ATI Stream) is a set of advanced hardware and software technologies that enable AMD graphics processors (GPUs), working in concert with the system’s central processors (CPUs), to accelerate enabled applications beyond traditional graphics and video processing.

Here is a testing


Test 1. AMD Radeon HD6370 (GPU)vs. AMD Dual- Core E2-3200 processor(CPU)

amd app encoding test 1

Test 2. AMD Radeon HD 5800 (GPU) vs. Intel(R) Core(TM) i7-2600K (CPU)

amd app encoding test 2

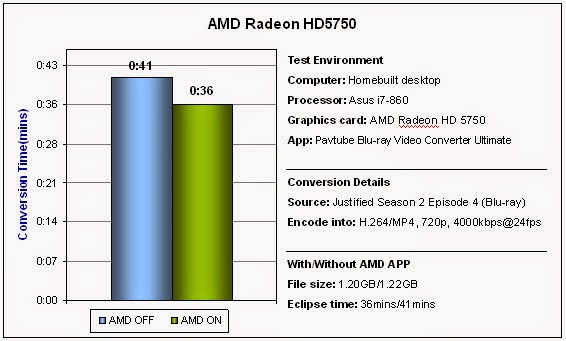
Test 3. AMD Radeon HD 5750 (GPU) vs. Asus i7-860 (CPU)

amd app encoding test 3

A Summary to GPU Encoding

Overall, we get faster transcoding speed when turning on AMD APP accelerated decoding, and see clear differences between hardware-accelerated decoders. The AMD Radeon HD6370 brings much better result than that with the other two Radeon HD graphics cards. The suggestion here is that you’d see better results if you were stuck on an older machine with a slower processor and modern graphics card (AMD Radeon HD 6000 series and later models).

While working with video clip, we noticed that our files weren’t all the same size. Not only do two different cards not output the same data, but one card isn’t guaranteed to give you the same result from run to run.

GPU-Accelerated encoding with CUDA/AMD APP (formerly ATI Stream):Faster DVD & Blu-ray ripping

Pavtube products support newest NVIDIA CUDA & AMD APP technology in BD/DVD decoding to improve performance and ensure users much faster conversion speed than ever before when coping/ripping/converting DVD/Blu-ray, since more CPU resources are spared because of NVIDIA CUDA's harnessing the power of GPU and AMD APP's co-using of GPU and CPU.

(GPU encoding alllowes the product to use new NVIDIA CUDA, AMD and Intel Core technologies to convert any DVD and common videos in all popular formats 6 times faster. Pavtube products make full use of the power of the GPU maximumly and spare efforts to get better results.)

NVIDIA CUDA & AMD APP Supported Pavtube Products

BDMagic, DVDAid, ByteCopy, Video Converter Ultimate

Simple interface and CUDA acceleration will bring you an easy but effective conversion. In other applications, we were prompted with audio codec errors, as none recognizes TrueHD.

How to enable CUDA acceleration?

Click "Option" icon on the interface and then go to Acceleration option, you can choose to check Enable GPU acceleration, which will help to speed up conversion. Here you can check your graphic card is supported or not.

Read More:

Monday, July 21, 2014

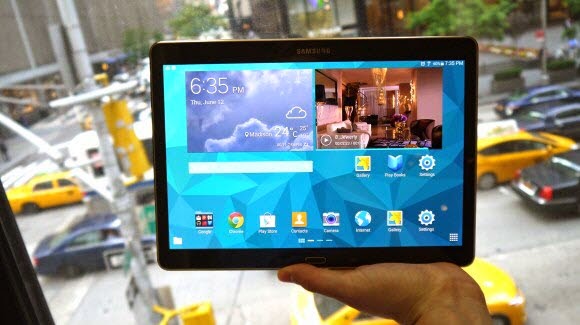
Is it possible to play DVD ISO on Samsung Galaxy Tab S 10.5?

Simply follow this guide to rip and convert DVD ISO to MP4 videos for playing on Samsung Galaxy Tab S 10.5 more conveniently.

Nowadays, many folks like to backup their DVD Discs into ISO image files. If you have ripped your DVD movies to ISO files or have some DVD ISO image files downloaded from the Internet, you may want to put these DVD ISO to your Android tablet like the popular Galaxy Tab S 10.5. Then what should you do? Does Galaxy Tab S 10.5 suppport playing DVD .iso format?


In this article, you are going to learn how to convert DVD ISO to Galaxy Tab S 10.5 playable videos with fast ripping speed and lossless video quality.

In fact, Galaxy Tab S 10.5 supports but only H.263, H.264(AVC), MPEG4, VC-1, WMV7, WMV8, VP8 format of videos. While the DVD iso image file is encoded with MPEG-2 which is uncompatible with Galaxy Tab S 10.5. So before transferring DVD iso files to Galaxy Tab S 10.5, you need to transcode DVD iso to H.264 mp4 videos or something else which the Galaxy Tab S 10.5 natively accepts.

No worries for this, here an easy solution on both Windows and Mac: all you need is a simple and easy-to-use DVD to Galaxy Tab S Converter to rip DVD ISO/IFO image files to MP4 that works beautifully on Galaxy Tab S 10.5, then you can freely play DVD ISO/IFO on Galaxy Tab S 10.5. As it's named, this tool could aid you with all kinds of DVD movies, like DVD discs, DVD ISO or IFO image files etc. It runs fast and you will be amazed at the best visual picture quality.

How to Convert DVD ISO/IFO files to Galaxy Tab S 10.5 for watching

Step 1. Add DVD ISO image files

Install this DVD ISO to Galaxy Tab S Converter on your computer. Run it and load your DVD ISO/IFO image file into it.

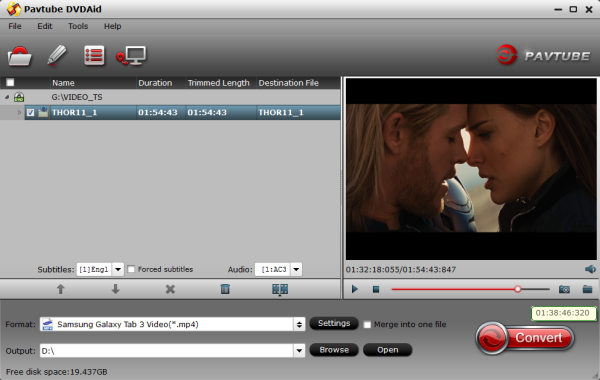
Pavtube DVDAid will detect and check the main title automatically; keep it as default unless you also want to convert the tidbits.


Step 2. Choose Galaxy Tab S 10.5 video format.

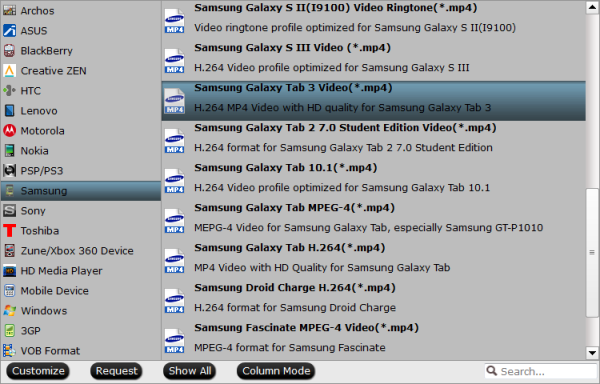
Click "Format" menu and go through the dropdown list, you are recommended to choose the "Samsung -> Samsung Galaxy Tab 3 Video(*.mp4)". It is also fit for  Galaxy Tab S 10.5.


If you want to rip DVD ISO/IFO for Galaxy Tab S 10.5 with multiple audio tracks and subtitles, Bytecopy will help you with special multiple track MP4 profiles. Choose "Multi-track MP4 (*.mp4)" from "Multi-track Video".

Step 3. Customize outputting video specs. (Optional)

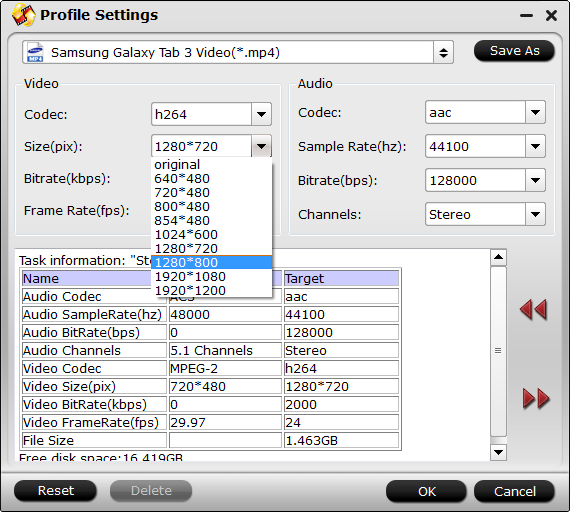
You can click Settings bottom to adjust the output parameters including video codec, size, bitrate, framerate and sample rate(Hz). Here, you can set video size to "1280*800" for playing DVD video on Galaxy Tab S 10.5 with 2560 x 1600 resolution. Generally speaking, the higher video bit rate will result in the larger output file size, and vice versa.


Step 4. Start converting DVD ISO/IFO image to Galaxy Tab S 10.5.

Click the red "Convert" to start converting DVD ISO/IFO to MP4 for Galaxy Tab S 10.5. After conversion, you can click "Open output folder" to quick location converted videos.

Transfer videos, music, photos from PC to Galaxy Tab S 10.5

In this way, you can play DVD ISO/IFO files on Galaxy Tab S 10.5 with ease anywhere you like.

Read More:

Thursday, July 17, 2014

Transfer Rio 2 Blu-ray to play on BlackBerry Z30 and Z10

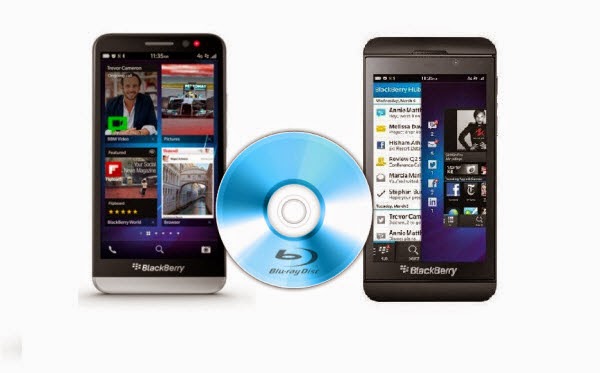
If you want to copy Blu-ray to BlackBerry Phone for watching, refer to below article for brief instruction about how to transfer Rio 2 Blu-ray to play on BlackBerry Z30 and Z10. 

This week movies like All Cheerleaders Die, Noah, Nymphomaniac: Volume I and II, Rio 2, Sabotage, Twin Peaks: The Entire Mystery, The Other Woman, The Angriest Man in Brooklyn all come to Blu-ray shelves, among which I like Rio 2 best. Now I recently purchased a BlackBerry Z30 to replace my old BlackBerry Z10, and to backup my favorite Rio 2 Blu-ray movie onto both of them, I'm looking for a detailed guide. As I'd love to put couple of my Blu-ray collections on my BlackBerry Z30 and Z10 for watching with a much more acceptable and widely used 5 inch screen and a rather unusual 4.2 inches screen. 

After searching, I find I face difficulty to play Rio 2 Blu-ray with BlackBerry Z30 and Z10 due to uncompatible format with Blu-ray contents. In that case, I need to convert Blu-ray to BlackBerry optimized MP4 format at first so that I can easily watch Rio 2 Blu-ray movies on BlackBerry Z30 and Z10 and feast my eyes. Here I will share my tutorial to achieve my goal with Pavtube BDMagic. 

At first, Pavtube BDMagic is recommeded for it's simple workflow and reliable video quality. (Full Review 

NOTE: you need to get an external Blu-ray drive to make your Windows/Mac recognize Blu-rays. 

Step-by-step instruction about transferring Rio 2 Blu-ray to BlackBerry Z30 and Z10 

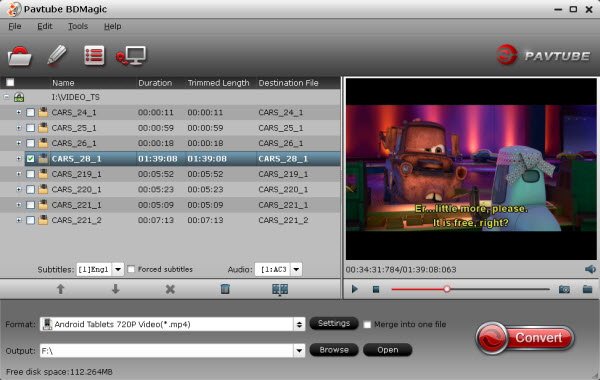
Step 1. Add Blu-ray files. 

Click "Load Disc" icon to add your Blu-rays into this top Blu-ray to BlackBerry Converter


Step 2. Choose output format. 

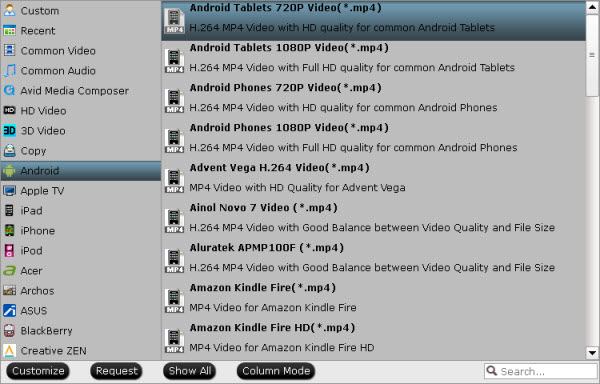
Click "Format" bar and choose optimized profile for your BlackBerry Z30 and Z10. 

You are recommended to choose BlackBerry Z30 and Z10 playable format under "Android > Android Phones 720P Video(*.mp4)" for this Blu-ray to BlackBerry conversion. 


Step 3. Customize profile settings. (Optional) 

If you are not satisfied with profile presets for output, or you choose a common profile and would like to get better video quality, click "Settings" button next to Profile box to change output profile parameters like video codec, audio codec, video size, bit rate, framerate, etc. As The resolution on the 4.2 inch panel of the Z10 is 1280×768 pixels, while the Z30 features a more mainstream resolution of 1280×720 pixels, 1280*720 size, and 1000 ~ 1500 kbps is OK for both BlackBerry Z30 and Z10. 

Step 4. Start Rio 2 Blu-ray to BlackBerry Z30 and Z10 conversion. 

Click the big red "Convert" icon to start converting Rio 2 Blu-ray to H.264 MP4 for watching on BlackBerry Z30 and Z10. Once finished, click "Open" icon on main UI to locate the generated MP4 files on computer and transfer converted Blu-ray to BlackBerry Z30 and Z10 for playing.

Hope this Blu-ray Ripper for BlackBerry will help you, for Mac users, BDMagic for Mac is the best choice for you. (Top Mac Blu-ray Ripper Review for Android, Apple and Windows devices 

Wednesday, July 9, 2014

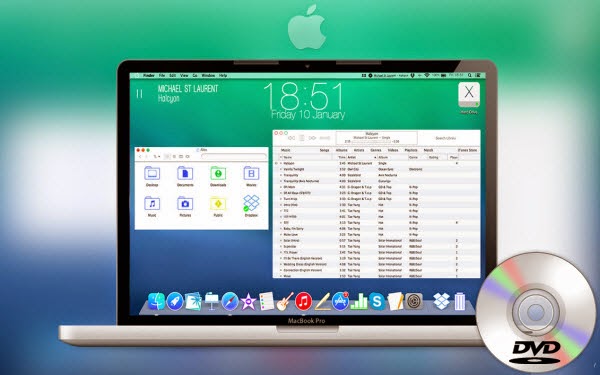
Best OS X 10.10 DVD Ripper - Convert DVDs on Mac OS X 10.10 Yosemite

This article focuses on the way for ripping and copying DVDs on Mac OS X 10.0. 

Mac OS X 10.10 Yosemite

What is Mac OS X 10.10 Yosemite?
 
OS X 10.10 refers to the 2014 version of operating system exclusively unveiled at WWDC 2014 permitted to run on Mac computer by Apple Inc., after OS X 10.9 Mavericks.

Though the latest Mac OS X 10.10 would benefit us a lot to some extent, the point is that it will make a bonanza of Mac-relevant software be wayside as well. Take ripping DVD on Mac OS X 10.10 Yosemite for instance, supposed you do that on Mac OS X 10.10, for most part, you will get nothing but fail miserably, for you know, the ordinary DVD rippers are incompatible with Mac OS X 10.10. 

  
For whatever purpose, you only need a top DVD ripper software to rip DVD movie disc on OS X 10.10 Yosemite. And here Pavtube ByteCopy for Mac will be exactly what you are looking for. More importantly, it is fully compatible with the newly unveiled Mac OS X 10.10 Yosemite. For Mac users, ripping DVDs on Yosemite is the first and crucial process before they play DVD videos with more media players on Mac, iPhone, iPad, iPod, Apple TV and so on.

Before getting started, let’s take a general look at what Pavtube ByteCopy for Mac can be used for.
  • Rip the new released DVDs disc to WMV, AVI, MOV, MKV, M4V, FLV, 3GP, MPG, and more.
  • Convert DVD to for iPhone 6/6 Plus, iPad Air 2, Apple TV, Galaxy Note Pro, Galaxy Tab Pro, Amazon Fire Phone, Vetech InnoTab Max/3S Plus/3 Plus, Surface Pro 3, Surface Pro 2, Surface 2, Nexus 9, Nexus 6, PSP, PS3, Xbox 360, Zune, and other smartphones, tablets, media players.
  • Extract DVD movies to MP3, AC3, M4A, WAV and various audio formats.
  • Attach SRT/ASS/SSA subtitles to source DVD video 
How to Convert DVD on OS X 10.10 Yosemite using the best OS X 10.0 DVD Ripper?

Download Pavtube ByteCopy for Mac which will go good with your new Mac OS without updating. Install and launch it. Similar to ripping DVD to Mavericks, it is as easy as A-B-C.


A. Add the DVD source

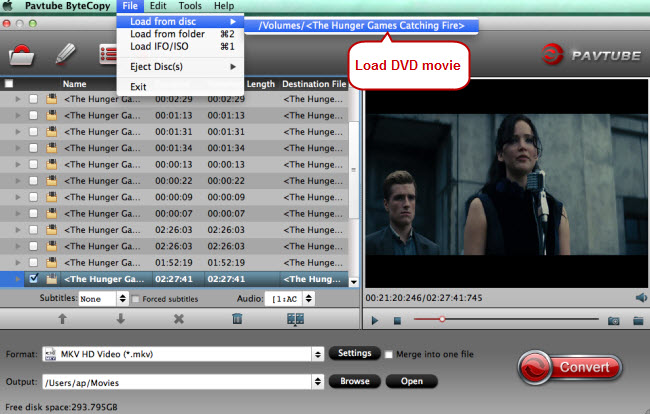
Insert a DVD disc into your Mac OS X 10.10, and click the "Load disc" button on the left top of software UI to load your DVD content. Alternatively, you can add a DVD folder or ISO image file from your hard drive. And 
The Yosemite DVD Ripper will check and choose the main DVD title (always the longest) for you immediately.

load dvd movie to dvd to mede8er converter  


B. Choose an output format

You are enabled to choose an idea output format according to your needs. It supports converting DVDs to any Mac and PC friendly videos or playing the videos on iPhone 6/6 Plus, Apple TV 3, iPad Mini 3, iPad Air 2, Android tablets, smartphones, PSP and so on.

rip blu-ray to ps3 mp4  


Tip: The software allows you to change the Destination Folder to save the output digital file, or make advanced parameter settings, etc. But all are optional. 

C.  Start the conversion process

Afterwards, you may simply hit the "Convert" button on the bottom. For any feature-length movie, it takes less than half an hour to complete the process, but it also depends on the configuration and situation of your Mac, as well as the output format you choose.

When the conversion is done, the converted DVD movie folder in your hard drive will pop up automatically. Now enjoy the DVD movies hassle free

It is really easy to r
ip DVD on Mac OS X 10.10 Yosemite? Just have a try now!

Learn more: