Friday, June 30, 2017

3 Ways to Play ISO Files with VLC

As a free and open-source cross-platform media player, VLC media player supports many audio and video compression methods and file formats, including DVD-Video, video CD and streaming protocols, etc. ISO files are image files that contain information that is saved on discs, such as DVDs or CDs. These types of files cannot be read on their own, as they must be joined with the tracks or other data associated with the ISO file. Burning an ISO file onto a blank disc just to read the image is a lengthy and unnecessary process. VLC Media Player, the software program that "plays everything," opens ISO files, allows you to preview the file in less than one minute and do so for free.

Part 1: 3 ways to play ISO files with VLC media player
Part 2: Step by step guide to play ISO files with VLC
Part 3: Best VLC assistant to rip ISO files for VLC Playing

Part 1: 3 Ways to play ISO files with VLC media player

Method 1: On the top menu bar of VLC media player, from "Media" drop-down list, choose "Open File" to open a browser-like dialog to choose your desired ISO image, then click "Open" button to play the content in the ISO file immediately.

Method 2: Open your Windows Explorer Window. Directly drag and drop the ISO file into the main interface of the VLC Media Player.

Method 3: Right click on the ISO file to select "Open with" option and then "Choose default program". Then choose "More Programs". If you're unable to do it in your computer at the first attempt, you can choose this media player from the list.

You have to check the most suitable checkbox in the program list. This process lets VLC Media Player to open ISO files usually. This simple method makes this media player as the default program to open every ISO file.

Part 2: Step by Step to Play ISO Files on VLC media player

Step 1: Open VLC Media Player.
Step 1: Click on "File." Choose "Open File." A window will open inside VLC.
Step 2: Click the first "Browse" button on the right side of the window. A VLC "Browse" window will open.
Step 3: Click the name of the ISO file that you want to play. The ISO file will be highlighted.
Step 4: Click "Open." The ISO file will play in VLC Media Player.

Part 3: Best assistant to rip ISO files for VLC Playback

Sometimes, you may fail to open certain ISO files with VLC. The main reason is that ISO is actually an archive file which is used to backup CDs or DVDs. VLC can play ISO files as long as the DVD structure is intact (it also means that the ISO file must have the exact same folders that are in your DVD such as Video_TS folder). If the directory structure of ISO image is not similar to that of DVD, you will fail to play the file on VLC.

When in that condition, you can use a ISO ripper such as Pavtube ByteCopy to facilitate you to rip the ISO image file to VLC media player readable video and audio file formats listed below:

Container formats: 3GP, ASF, AVI, DVR-MS, FLV, Matroska(MKV), MIDI, QuickTime File Format, MP4, Ogg, OGM, WAV, MPEG-2 (ES, PS, TS, PVA, MP3), AIFF, Raw audio, Raw DV, MXF, VOB, RM, DVD-Video, VCD, SVCD, CD Audio, DVB
Video format: Cinepak, Dirac, DV, H.263, H.264/MPEG-4 AVC, HuffYUV, Indeo 3, MJPEG, MPEG-1, MPEG-2, MPEG-4 Part 2, RealVideo 3&4, Sorenson, Theora, VC-1, VP5, VP6, VP8, VP9, DNxHD, Prores and some WMV
Audio formats: AAC, AC3, ALAC, AMR, DTS, DV Audio, XM, FLAC, It, MACE, Mod, Monkey's Audio, MP3, Opus, PLS, QDM2/QDMC, RealAudio, Speex, SCreamtracker 3/S3M, TTA, Vorbis, WavPack, WMA (WMA 1/2, WMA 3 partially).

Tips: To get better output video and audio quality, click "Settings" on the main interface to open "Profile Settings" window, here, you can flexibly choose or specify exactly the profile parameters including video codec, resolution, bit rate, frame rate, audio codec, bit rate, sample rate, channels, etc as you like.

For Mac users, you can download Pavtube ByteCopy for Mac to do the same ripping process on macOS Sierra or macOS High Sierra.

Get Pavtube ByteCopy with 20% off discount, coupon codec: 45K2D47GJH

How to Convert ISO Files for VLC Media Player?

Step 1: Load ISO image file to the program.

Run the program on your computer, click "File" > "Load IFO/ISO" to load ISO image file into the program.

Load ISO files into the program

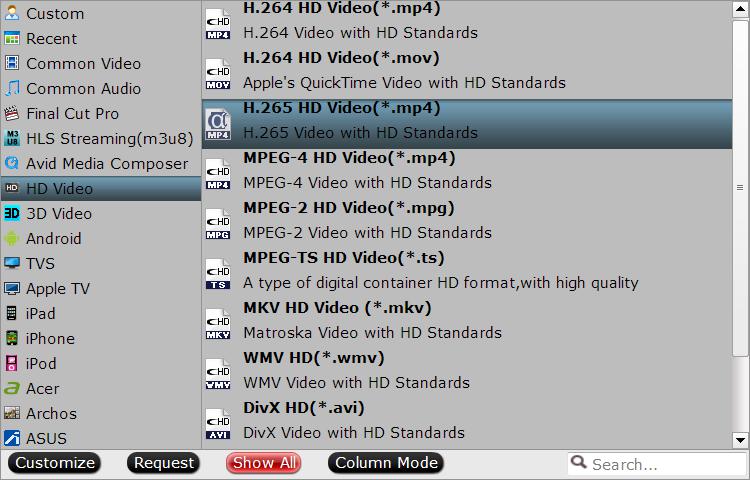
Step 2: Choose output file format.

Click "Format" bar, from its drop-down option, select one of VLC most playable digital file formats such as "H.264 HD Video (*.mp4)" under "HD Video" main category.

Choose output file format

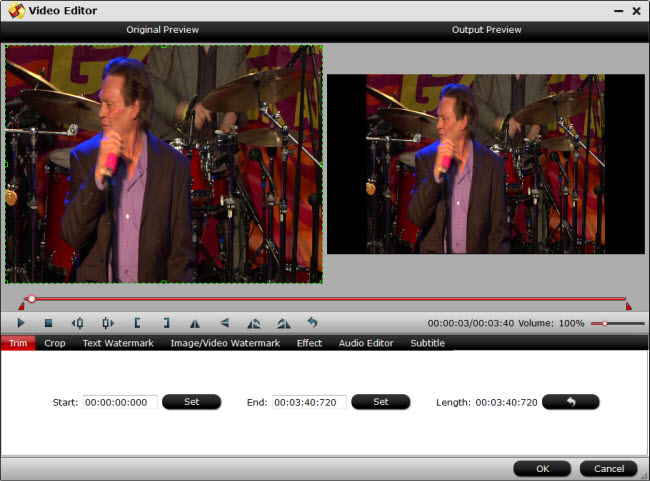
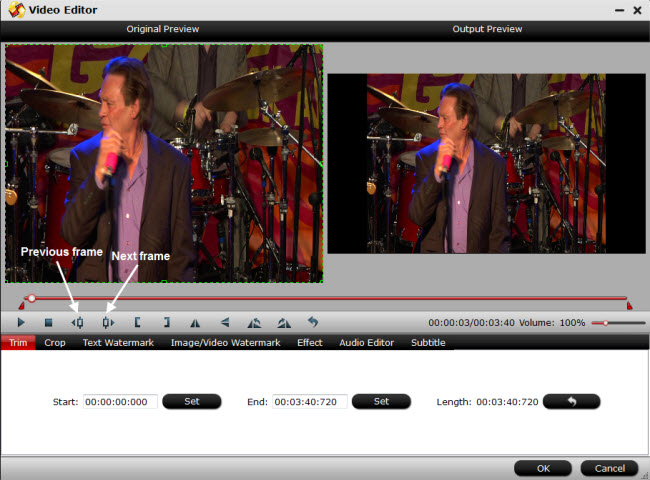
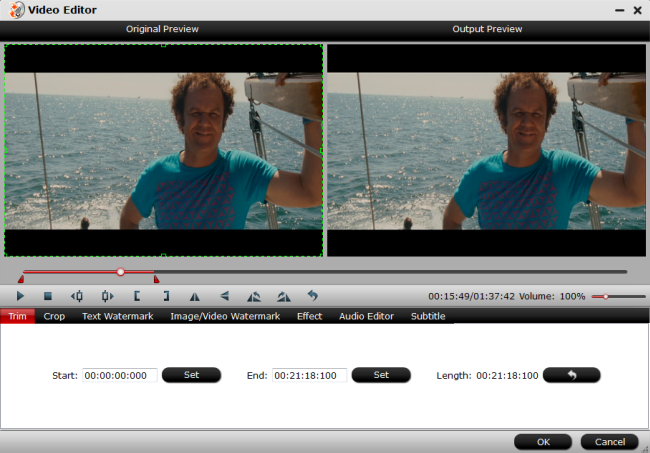
Step 3: Customize output profile parameters.

Click settings to open "Profile Settings" window, here you can flexibly adjust output video/audio codec, file resolution, bit rate, frame rate, sample rate, etc according to your own situations.

Customize output profile parameters

Step 4: Start ISO to VLC media player converting process.

One click the big button "Convert" on bottom-right corner to start conversion.

Once finishing conversion, you will have no problem to play converted digital files with VLC media player on both Windows and Mac.

Friday, June 23, 2017

Free Download HD to MP4 Converter for Laptop/PC

Have a robust library of HD video or movies downloaded from online video sharing sites, shot with HD camera, camcorder or ripped from Blu-ray or HD DVD disc and wish to find a HD to MP4 Converter for Laptop/PC so that you can easily play the converted HD files on computer with media player softare, transfer to smartphone, tablets for watching on the move or stream to large screen TV, game consoles via home media server. The following article will recommend you a remarkable HD to MP4 Converter - Pavtube Video Converter to batch convert all HD video to various MP4 file formats to satisfy your different demand.

Main functions of Best HD to MP4 Converter for Laptop/PC

Pavtube Video Converter outshines all its competitors with the following powerful functions.

- Enhanced media compatibility for all HD file formats such as AVCHD MTS/M2TS, MXF, XAVC/XAVC S, HD H.264, HD H.265, HD AVI, HD WMV, HD MP4, HD MKV, HD MOV, etc downloaded from online video sharing sites, shot with HD device recorders or ripped from Blu-ray or HD DVD disc.
- Output HD video to SD or HD MP4 files format with various compression codec like MPEG-4, H.264, H.265.
- Directly produce hot devices and programs preset MP4 file formats with the optimal playing, editing and sharing settings.
- You can also upscale 1080p to 4K video for viewing on 4K capable devices or programs.
- Flexibly adjust output profile parameters like video codec, resolution, bit rate, frame rate, audio codec, bit rate, sample rate, channels, etc to get better output video and audio quality.
- Trim/Merge/Split/Watermark/Deinterlace video, add watermark, apply special effect, insert external subtitle to MP4 video to enhance the video to another high level.

Bonus features of Best HD to MP4 Converter for Laptop/PC

- Batch conversion mode to process a number of files at one time
- Perfect compatiblity with Windows 10, 8.1, 8 and 7.
- Quite simple to use. Anyone can learn to use it in minutes
- The program is 100% clean, no spyware, no malware, no adware and no virus
- Very stable during the conversion process, no sudden crashes
- Produce high quality conversion results with better video/audio quality

Get Pavtube Video Converter with 20% off discount, coupon codec: 45K2D47GJH

Step by Step to Convert HD Video to MP4 for Laptop/PC

Step 1: Load HD video.

Download the free trial version of the program. Launch it on your computer. Click "File" menu and select "Add Video/Audio" or click the "Add Video" button on the top tool bar to import source HD video files into the program.

Import HD video

Tips: If you want to batch load multiple files, make sure to store all your files in the same folder, then click "File" > "Add from folder" or press the "Add from Folder" button on the top tool bar to batch importing them into the program.

Step 2: Define the output format.

Clicking the Format bar, from its drop-down list, select one of your desired MP4 format according to your own needs. If you wish to produce a small file size MP4 video with perfect quality, we highly recommend you to choose "H.264 HD Video(*.mp4)" under "HD Video" main category.

Select output file format

Tips: Click "Settings" on the main interface to open "Profile Settings" window, here all the profile parameters including video codec, resolution, bit rate, frame rate, audio codec, bit rate, sample rate, channels, etc are adjustable to facilitate you to make a balance between the video quality and the file size.

Step 3: Edit video with built-in editing tools.

By default the Edit icon is grayed out. To activate the Edit menu, you have to select an item first. When a video or movie is selected, click the pencil like Edit icon on the left top tool bar to open the video editor window, here, you can play and preview the original video and output effects. Also you can flip or rotate video, trim, crop, add watermark, apply special effect, edit audio or insert external.

Edit video with built-in editing tools

Step 4: Begin the conversion process.

After all setting is completed, hit the "Convert" button at the right bottom of the main interface to begin the conversion process from HD video to your desired MP4 format conversion process.

When the conversion is finished, click "Open Output Folder" icon on the main interface to open the folder with generated files. Then feel free to play, edit and share the converted MP4 files on computer, portable devices, editing software, video sharing sites, etc.

Friday, June 16, 2017

Panasonic TV Can’t Play MP4 Files from USB Drive

More and more new Panasonic TVs now offer built-in USB drive for you to play local video or music store on it, however, a lot of user complain that they fall into the trouble to play mp4 files on Panasonic TV from USB just as the condition listed below:

"The TV is a Panasonic Viera TX-50CX802. Seems like a fine television but issues trying to play anything through a USB port. I have tried putting a movie file onto a USB flash drive and placing it into one of the 3 USB slots but I cant even find a way to see the files in them. I go to devices but they dont show up there, and I look at the inputs but it doesnt list the USB ports. So no idea how I can actually it to play a movie from one. I have tried 3 different usb keys but it makes no difference. What am I doing wrong? I'm sure this is supposed to be possible."

Why Panasonic TV not play MP4 files from USB?

As a matter of fact, there are two important factors that will decide whether you can successfully play MP4 files on Panasonic TV from USB
- A properly formatted USB drive
- The right MP4 format that Panasonic TV recognize

Properly formatted USB drive

To playback video stored on USB on Panasonic TV, you must format your USB drive into a format
Your Panasonic TV may doesn't like the more advanced file systems such as NTFS that's compatible with your Panasonic TV. The FAT32 is the format that works on TV sets.. What's more, different format USB drive has different storage capability, , for FAT32 usb drive, the maximum file size limitation is 4GB.

The right MP4 format that Panasonic TV support

You may have no problem to play certain MP4 files on Panasonic TV but fail to open other MP4 files on it. The main reason is that MP4 is a container file format, which can hold various different video and audio codec, you can only play MP4 files with supported codec on Panasonic TV. And you can consult the user manual or promotional material for the particular Panasonic set to which see MP4 file formats it support.

Hot Search: Play AVI on Samsung TV | Play DVD on Samsung Smart TV

Convert MP4 for Panasonic Viera TV playback

To get unsupported MP4 files played on Panasonic TV from USB, you can download this remarkable MP4 to Panasonic TV conversion program - Pavtube Video Converter (best video converter review). The program can comprehensively convert any MP4 files formats with with codec of H.264/H.265/MPEG-1/MPEG-2/VC-1/WMV/MVC, etc into Panasonic TV preset profile formats will the optimal playback settings including video codec, bitrate, frame rate, resolution and audio codec, bit rate, sample rate and channles, etc.

Compress MP4 for Panasonic TV USB drive

As the compatible Format 32 usb drive of Panasonic TV can only store video that's less than 4GB, if your MP4 file is larger than 4GB, you can compress the MP4 video with the following ways:
- Trim MP4 into short length by cutting off unwanted parts or segments (no quality loss)
- Split large MP4 into small clips by file size, count or length(no quality loss)
- Lower the output video resolution (less quality loss)
- Lower the bit rate 20-50% of the default to get small files (less quality loss)
- Lower the frame rate of the video to 15 or 10 fps can reduce the file size by as much as 1/2 or 2/3(less quality loss)

Get Pavtube Video Converter with 20% off discount, coupon codec: 45K2D47GJH

How to Convert MP4 for Panasonic TV Playback from USB?

Step 1: Load MP4 files into the program.

Install and launch the MP4 video converter program on your computer, click "File" > "Add Video/Audio" or "Add from Folder" to load unsupported MP4 files into the program.

Load MP4 files into the program

Step 2: Output Panasonic TV preset playable formats.

From "Format" bar drop-down list, directly output Panasonic Viera TV preset profile formats "Panasonic TV(*.mp4)" from "TVs" drop-down list.

Output Panasonic TV preset playable formats

Step 3: Compress large MP4 video.

Trim video to shorten video length

Open "Video Editor" window and switch to the "Trim" tab, you can drag the slider bars to include the segment you want to remain, click the left square bracket to set start point, and click the right square bracket to set end point when previewing the video or directly input specific values to "Start" and "End" box.

Trim MP4 video

Split large MP4 video

By clicking the "Split" button on file list, or from "Edit" menu, you can launch the "Video Split" window. Checking "Enable" to enable it, and then you can split the file by file count, time length, or file size.

Split large MP4 video

Lower resolution/bit rate/frame rate

Click "Settings" to open "Profile Settings" window, you can change video resolution to a suitable file size, lower the bit rate 20-50% of the default to get small files or lower the frame rate to 15 or 10 fps.

Step 5: Begin the conversion process.

After all setting is completed, hit right-bottom "Convert" button to begin the MP4 to Panasonic TV supported formats conversion, trimming and compression process.

When the conversion is completed, you can have no problem to play MP4 files on Panasonic TV from USB drive.

Join Pavtube Happy Father's Day Great Promotion to get Blu-ray/DVD/Video conversion tool with 20% off discount
20% Coupon Codec for all products: 45K2D47GJH

  • Store 4K Video on Cloud Storage
  • Friday, June 9, 2017

    Best MKV to MP4 Video Converter for Windows 10/8.1/8/7

    What is MKV and MP4?

    MKV is a Matroska Multimedia Container format that can hold an unlimited number of video, audio, picture or subtitle tracks inside a single file. It is intended to serve as a universal format for storing common multimedia content, like movies or TV shows. MKV can hold all of the same digital elements of MP4. MKV can also compress high quality videos into smaller files.

    MPEG-4 Part 14 or MP4 is a digital multimedia container format most commonly used to store video and audio, but it can also be used to store other data such as subtitles and still images. Like most modern container formats, it allows streaming over the Internet.

    Why Convert MKV to MP4?

    When comparing with MP4, MKV is still far from being widely supported on mobile devices and even computers as MKV files are often too "heavy" for smooth playback. In addition, even if you can play MKV files on some software-based media players like VLC, but you may fail to load them into the default media player apps on Windows such as Windows Media Player or household media players like iTunes. To fix this problem, it would be much idea for you to convert MKV to MP4, a more program or device compatible file format for viewing anywhere at any time.

    Best tool to convert MKV to MP4

    If you are looking for a powerful yet simple to use MKV to MP4 Converter for Windows 10/8.1/8/7, we highly recommend Pavtube Video Converter Ultimate to you. The program has support support for SD/HD/2K/4K MKV video encoded with various different video and audio compression codec listed below:
    Video codec: MPEG-1, MPEG-2, MPEG-4 (A)SP, H.264/MPEG-4, H.265/HEVC, VC-1/WMV, Real Video, Theora, Microsoft MPEG4 V2, VP8, MVC
    Audio codec: MP3, WMA, AAC, AC-3, DTS,ALAC, DTS-HD

    With the program, you can batch multiple convert MKV files to MP4 with various compression codec such as MPEG-4 MP4, H.264 MP4, H.265 MP4 and file resolution such as HD MPEG-4, H.264 HD MP4, H.265 HD MP4, 4K H.265 MP4, 4K H.264 High Profile MP4. Besides that, you can also use the program to produce 3D SBS/TAB/Anaglyph MP4 format for viewing on 3D TV/VR Headsets/3D Projector/3D Video Player.

    To get better output video and audio file quality, you can flexibly adjust output profile parameters including video codec, resolution, bit rate, frame rate, audio codec, bit rate, sample rate, channels, etc as you like to get better output file quality.

    For smartphone, tablets, game consoles, TVs owners, just feel free to produce MKV to MP4 that's specially tailored for specific devices and programs. You can then directly view the output files on those hot devices and programs with the best playback settings.

    Edit MP4 files with built-in editing tools

    You can get your desired MP4 video with built-in editing tools. You can flip or rotate MP4 video, trim or cut off unwanted parts from the mp4 video clip, crop off unwanted black bars or area, add video/image/transparent text watermark to video, apply special rendering effect or insert external SRT/ASS/SSA subtitle to MP4 video.

    Step by Step to Convert MKV to MP4

    Step 1: Load MKV files.

    Download the free trial version of the program. Launch it on your computer. Click "File" menu and select "Add Video/Audio" or click the "Add Video" button on the top tool bar to import source MKV video files into the program.

    Import source MKV video files

    Step 2: Define output file format.

    Clicking the Format bar, from its drop-down list, select one of your desired MP4 file format according to your own needs.

    Output H.264 HD MP4

    Output H.264 HD MP4

    Output H.265 HD MP4

    Output H.265 HD MP4

    You can also choose other MP4 file types according to your own needs.

    Output H.264 High Profile video

    Output H.264 High Profile video

    Tips: Click "Settings" on the main interface to open "Profile Settings" window, here, you can flexibly choose or specify exactly the profile parameters including video codec, resolution, bit rate, frame rate, audio codec, bit rate, sample rate, channels, etc as you like to get better output video and audio quality.

    Step 3: Edit video with built-in editing functions.

    By default the Edit icon is grayed out. To activate the Edit menu, you have to select an item first. When a video or movie is selected, click the pencil like Edit icon on the left top tool bar to open the video editor window, here, you can play and preview the original video and output effects. Also you can flip or rotate video, trim, crop, add watermark, apply special effect, edit audio or insert external.

    Edit video

    Step 4: Begin the conversion process.

    After all setting is completed, hit the "Convert" button at the right bottom of the main interface to begin the conversion process from Blu-ray ISO to MP4 conversion process.

    When the conversion is finished, click "Open Output Folder" icon on the main interface to open the folder with generated files. Then feel free to transfer the output MP4 file to smartphones, tablets or stream to TV, game consoles via media servers or media streaming devices.