VirtualDub is the open-source and portable video editor with the ability to compress videos while preserving good quality. Although it's not so fully-featured as other professional video editors, it certainly can accomplish more than a few tasks that you might think you need other separate applications for. Here let's see how to edit video using VirtualDub.
Table of Content
Now let’s take a look at video editing in VirtualDub.
- 1. Split & Trim Video with VirtualDub
- 2. Join & Merge Video with VirtualDub
- 3. Crop Video with VirtualDub
- 4. Rotate Video with VirtualDub
- 5. Compress Video with VirtualDub
- 6. Remove/Add audio in Video with VirtualDub
- 7. Add Subtitles to Video with VirtualDub
- 8. Add Logo/Watermark to Video with VirtualDub
Steps to Edit Videos in VirtualDub
1. Split & Trim Video with VirtualDubVirtualDub has the ability to split videos or trim a portion of a video file with the position slider. To do this: 1. Go to the Video Menu and check the "Direct stream copy" option. Then go to the Audio Menu and do the same. 2. Use the "Edit" > "Set selection start" and "Edit" > "Set selection end" commands to select a portion of video. This can also be done through the mark-in and mark-out buttons below the position slider or through the Home and End keys on the keyboard. Then the currently selected part will now turn blue at the slider. 3. After that, click the "File" > "Save as AVI" menu command to save the AVI segment. |
2. Join & Merge Video with VirtualDubTo join/merge multiple video files: 1. Go to "File" > "Append Avi Segment" to add another AVI video you want to have in your big video. You can only add one file at a time, so if you have many small video parts, you have to repeat this step and that may cost a lot of time. 2. Go to Video menu and make sure "Full processing mode " is selected there. 3. Click "Compression" under the Video Menu and choose the video codecs for your output videos. After that, go to "File" > "Save Segmented AVI" to save your work to your computer. |
3. Crop Video with VirtualDubVirtualDub allows you to crop at the beginning of any video filter, you can do it by following the steps below: 1. Check that you're in "Full Processing mode" and then go to "Video" > "Filters". You’ll notice that there’s a Cropping button that’s not quite clickable (because it’s only enabled after you have chosen a filter). 2. Then click on Add... and choose "null transform". That doesn't do anything to your video, but will ungray the Cropping button now. 3. In the Filter input cropping dialog box, you can either drag sides or adjust the offsets to crop videos. Tips: Change the dimensions will reduce the video quality, but you can use the resize filter to make the cropped video as the original video's resolution. |
4. Rotate Video with VirtualDubVirtualDub also enables you to rotate video in different angles. Here's a little trick to rotate your videos with it. 1. Choose the Video Menu and go to "Filters". 2. Then click on Add..., choose "rotate" and click "OK". Then the Rotate filter will provide you will all the necessary options to rotate your videos. You will certainly notice the presence of the "rotate 2" filter. Indeed, it allows you to can choose the degree of rotation of the video. |
5. Compress Video with VirtualDubVirtualDub is an ideal program to compress a video file while still retaining the quality of the original. Follow the steps below to see how it works. 1. Make sure "Full processing mode" is selected in the Video menu. Then go to "Video" > "Compression" to bring up the following dialog. 2. As shown in the image, select the XVID MPEG-4 codec and click Configure button to make Xvid settings. You can lower the "Target bitrate" to make your video smaller. 3. Then go to the Audio Menu and select "Full processing mode", and click "Compression" to open the dialog, where MPEG Layer-3 is recommended. 4. Now, to create the compressed file, choose the "File" > "Save as AVI" option and give a new name for the compressed file. Virtualdub should now start saving the compressed file to your chosen location. |
6. Remove/Add audio in Video with VirtualDubQuite a few people like removing sound from the original video file and replacing with new audio. You can easily achieve this with VirtualDub: 1. Go to the Audio Menu and choose "No audio" to remove the original audio. 2. Alternatively, add new audio by hitting on "Audio from other file". 3. Go to the Video menu, select "Direct stream copy" and then go to "File" > "Save as AVI" to save the new audio. |
7. Add Subtitles to Video with VirtualDubYou can use VirtualDub along with the VobSub filter filter to embed subtitles (*.srt, *.sub, *.ssa, *.ass, etc) into your movie permanently. Here is how: 1. First download VobSub filter and then unzip to install it. During the VobSub installation, please make sure that you've selected both "VobSub for VirtualDub" and "TextSub for VirtualDub and AviSynth" under plugins. You'll also need to specify the directory where you've unzipped VirtualDub. 2. Then go to "Video" > "Filters" to bring up the Filters dialog. Choose TextSub, click OK to browse to your subtitle file. When You’re ready, press OK. 3. Go to Video menu and make sure "Full processing mode " is selected there. Then click "Compression" and choose the video codecs for your output videos. After that, go to "File" > "Save as AVI" to save your work. |
8. Add Logo/Watermark to Video with VirtualDubYou can use the built-in logo filter to add a watermark to your video in VirtualDub within few clicks. 1. Go through "Video" > "Filters" , click Add.. . 2. In the Add Filters dialog, select "logo" to bring up the video logo setting dialog. Here you can add the logo image and adjust the settings as you like. 3. After that, go to the File Menu, select "Save as AVI". Enter a new name and save the file. |
Edit Video with VirtualDub Alternative
The lack of VirtualDub is that you only can edit AVI videos with it. If you want to edit MP4 video, MKV video, etc, you maybe need a VirtualDub alternative. Pavtube Video Converter Ultimate can alter VirtualDub to crop, trim, split, merge video and add subtitle to video, replace/mute audio in video, add watermark to video, etc. It can edit MP4, AVI, MKV, WMV, FLV, MOV, TS, MXF, M2TS, VRO, Blu-ray, DVD, etc video.
Free download and install Video Converter Ultimate on PC:


Get Mac Version here.
Edit Video with Pavtube Video Converter Ultimate
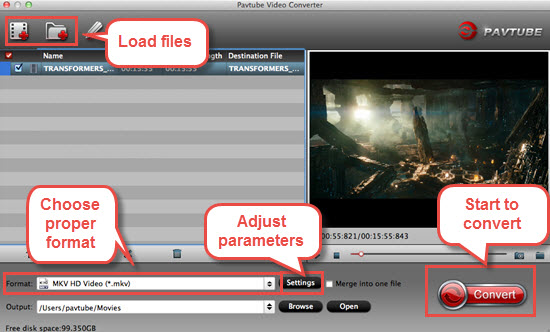
Load file(s)
When you start up Pavtube Video Converter Ultimate, the main interface pops up:
Load video files to the software using any of the three ways below:
A. Click “File” menu, and select “Load IFO/ISO”, “Load from folder”, “Load from disc”, "Add Video/Audio" or "Add from folder" to import source files.
B. Click “Load file(s)” button or “Add video" button to import source files.
C. Open the folder that contains source files, and drag and drop video, audio and image files to the program. Useful Tips: If you are loading TiVo shows to Pavtube Video Converter Ultimate, please enter your Media Access Key as the program asks, and then click "OK" button to confirm.
Edit Video
Pavtube Video Converter Ultimate is not only a converter program, but also a simple and easy video editor. By default the “Edit”icon is grayed out . To activate the “Edit” menu, you have to select an item first. When a video file is selected, you can click the “Edit” icon
  on the tool bar of main interface to edit selected file. On the “Video Editor” Window, you can play and preview the original video and output effects. Also you can flip video, trim, rotate, and reset.

Play/Pause: Click to start playing the current video or pause the playing.
Stop: Click to quit playback. Previous Frame: Click and go back to the previous frame.
Next Frame: Click and go to the next frame. Left square bracket: Click to set the start time for trimming.
Right square bracket: Click to set the end time for trimming.
Flip Horizontal: Click to flip the image horizontally.
Flip Vertical: Click to flip the image vertically.
Rotate conunter-clockwise: Click to rotate the image 90°towards left.
Rotate clockwise: Click to rotate the image 90°towards right.
Reset: Click to restore default value. In “Video Editor” there are seven edit tabs: Trim, Crop, Text Watermark, Image/Video Watermark, Effect, Audio Editor and Subtitle.

Trim: The "Trim" feature allows users to decide where to start and where to end when converting the selected clip, so that unwanted segments will be cut out after conversion. To trim a video, please switch to "Trim" tab in “Video Editor” Interface.
Trim frame by frame Pavtube Video Converter Ultimate offers "Previous Frame" and "Next Frame" options for users to select frames and trim accurately.
Crop: The "Crop" facility enables users to get rid of the black edges and unwanted area of the image.
Keep original aspect ratio and cropped aspect ratio
To keep original aspect ratio, users need make sure the "Display aspect ratio” and the "Size (pix)" in "Settings" option are all set as "Original". If you want to keep the cropped aspect ratio, Pavtube software offers several aspect ratios for you to choose from, including 16:10, 16:9, 5:4, 4:3, 3:2, and 2:1.
Text Watermark: Check Enable, you can add text watermark to selected video clip. You can either set parameters or drag the text on preview screen to set its location.
Image/Video Watermark: Check Enable, you can add images or videos as watermark onto selected video file. The location can also be set by dragging on the preview screen.
Effect: Under Effect tab, you can add special effects like Simple Gauss Blur, Flip Color, Invert, Aged Film to your source video. In Color Control section, you can correct color by adjusting brightness, contrast, and saturation. You can also tick off “Deinterlacing” to keep good image quality.
Audio Editor:You can either replace/remove original audio, or set audio fade in/out effects.
Subtitle: In this tab, you can add *.srt or *.ass/*.ssa subtitle-files to the video as hard subtitles.
Merge, Split and Select Subtitles and Audio Track
Merge selected files into one: By ticking off “Merge into one file” option behind “Settings” button, you can merge the ticked files in list into one single file.

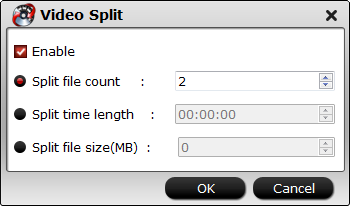
Split selected file into several small pieces:
By clicking the “Split” button  on file list, or from “Edit” menu, you can launch the “Video Split” window. Checking “Enable” to enable it, and then you can split the file by file count, time length, or file size.
Select desired subtitles stream and audio track
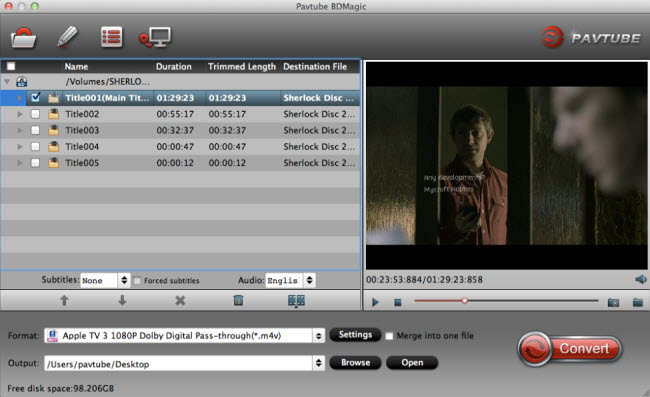
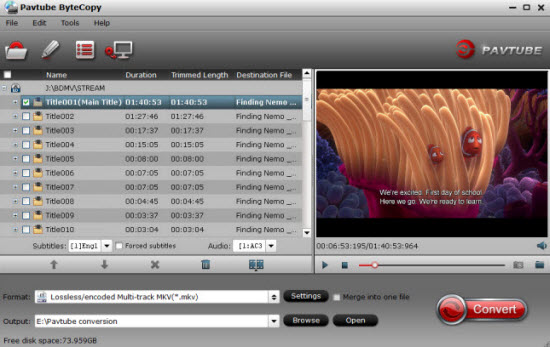
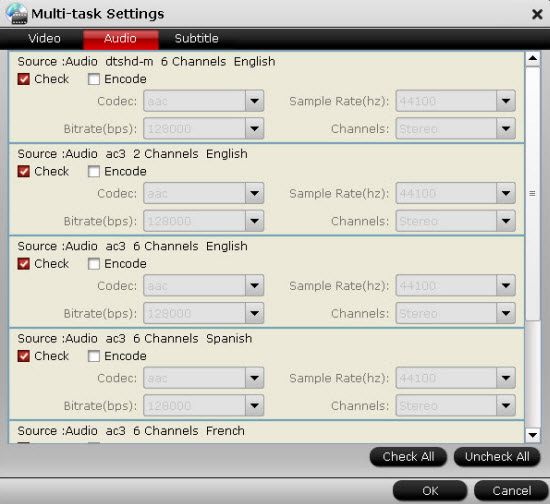
There is a bonus feature for you to select wanted subtitles track, and audio to be preserved in the converted files. To enable this feature, you should make sure there are multiple subtitles/audio tracks in your source file. Check the movie titles you want to rip.Click the drop-down list of Subtitles, then all the subtitles info in the Blu-ray/DVD movie will be shown clearly, so you can select your needed language as your subtitles freely.
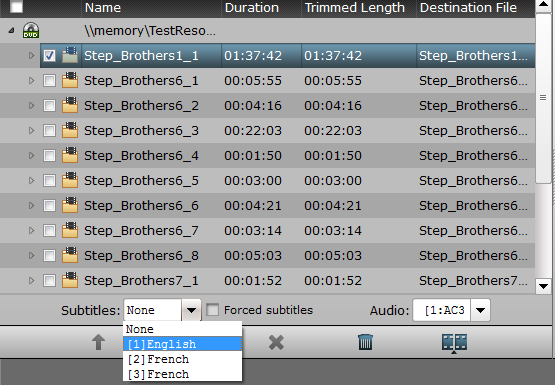
What’s more, Pavtube Video Converter Ultimate also offers an option called Forced subtitles, which enables you to see subtitles only when actors are speaking a different language. For instance, if you specify English (your mother tongue) as your subtitles, and meanwhile tick off “Forced subtitles” option, then when actors are speaking English, no subtitles will show up, but when they are talking with each other in French, the English subtitles will appear accompanying with the French. To select your desired audio track, just click the pull down menu of “Audio”, and then the popup drop-down list will give you the detailed information of all audio tracks, including language, audio codec and stream ID.

If you want to learn the details about each video editing, you can read the detailed steps: How to Edit Video with Pavtube Video Converter Ultimate?
Related Articles:
